How Do You Attach Kitchen Cabinets To The Wall - Island Journey Part 1 - Bower Power - Pantry cabinets can be installed in kitchens, laundry rooms, bathrooms and others.
How Do You Attach Kitchen Cabinets To The Wall - Island Journey Part 1 - Bower Power - Pantry cabinets can be installed in kitchens, laundry rooms, bathrooms and others.. Drill holes at each of your marks on the ledger or the back of the cabinet. Repeat the whole process for the remaining cabinets. This short article and video will show you the best way to attach cabinets to your wall, including the best locations for fasteners, the best types of fasteners to use, and tips on how to set fasteners more easily. To attach the cabinets to each other, use a no. How to install wall cabinets.
Drill the screws where the separate units meet on the top, bottom, front, and back. Mark the outline of each panel on the wall in its correct position. Starting in a corner, draw a line at the height where you want the bottom of your cabinet to be using a measuring tape, spirit level and pencil. Clamp the filler onto the cabinet flush with the inside of the vertical rail. Kitchen cabinets can be attached to concrete walls with the proper tools and preparation.
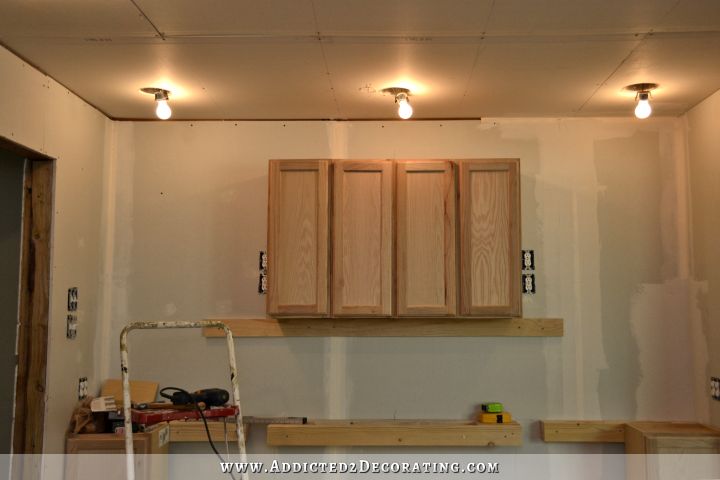
Wall Of Cabinets Installed (Plus, How To Install Upper ... from www.addicted2decorating.com These steps describe installing framed cabinets. Place the cabinet against the wall using a cabinet jack to prop the cabinet into place. Set it on the wall and secure it to the studs with screws. Next place it against the wall and use a sharp pencil or scribing tool traced against the wall to transpose the wall curve to the filler strip. Kitchen cabinets can be attached to concrete walls with the proper tools and preparation. To ensure a flush fit between this unit and its neighbor, join the two with a clamp. Simply drill in the cabinets into the desired location upon the board you placed earlier, and when finished remove the props and use them for the next cabinet. Put the cabinet jack beneath the cabinet, adjusting it so that it holds the cabinet level to the marked chalk line.
You must attach the cabinet to the studs inside the wall to secure it.
Place first lower cabinet at the location of the highest point in the floor using shims, a level. Proceed to install the other base cabinets. Put the cabinet jack beneath the cabinet, adjusting it so that it holds the cabinet level to the marked chalk line. Orient the first peninsula cabinet at a right angle to the wall. You must attach the cabinet to the studs inside the wall to secure it. Hanging upper kitchen cabinets is the next step in this series. Another step in how to install cabinets is to find the largest distance between the outside of the cabinet and the wall. Extreme caution should be used when maneuvering large cabinets to avoid scratching the cabinet or existing walls. How cabinets are attached to the wall in most kitchens cabinets are attached with screws through either the drywall or plaster into the wood stud behind. Cut ¾ inch plywood panels the height of your cabinets long enough to cover the entire installation area. This as well as being a level line to sit them on is also a good support when you're working on your own. You can now perform the installation of your cabinets as you would normally on a wall with studs. Clamp the filler onto the cabinet flush with the inside of the vertical rail.
Attach a cabinet to concrete walls with help from a kitchen cabinet. If possible, get someone to help hold the cabinet in place as well. If you need a refresher on how to take accurate measurements, watch our video on how to use a tape measure. This as well as being a level line to sit them on is also a good support when you're working on your own. Place the corner wall cabinet on the screws or ledger.
Installing Kitchen Wall Cabinets / Installing Ikea Upper ... from www.kellbot.com Use clamps to fix the stiles (the vertical pieces on the face of the cabinet frames) of the cabinets together and check for plumb, making sure the fronts of the cabinets are flush. Starting in a corner, draw a line at the height where you want the bottom of your cabinet to be using a measuring tape, spirit level and pencil. Use a level to ensure your cabinets are installed accurately. Set it on the wall and secure it to the studs with screws. Drill the screws where the separate units meet on the top, bottom, front, and back. The ledger board is a temporary board you will use to make installing the wall cabinets easier. Allows unit to tilt forwards or backwards from the wall. Take that measurement and make a pencil mark on your filler strip (measure over right to left in this case).
Pantry cabinets can be installed in kitchens, laundry rooms, bathrooms and others.
Once on the ledger, shim the cabinets if it is essential. 3 set the cabinet in place against the wall. First, cut the filler strip to the required width and attach to the cabinet. Proceed to install the other base cabinets. These steps describe installing framed cabinets. Take that measurement and make a pencil mark on your filler strip (measure over right to left in this case). How cabinets are attached to the wall in most kitchens cabinets are attached with screws through either the drywall or plaster into the wood stud behind. Then, drill and countersink four pilot holes and attach with screws. Place the corner wall cabinet on the screws or ledger. To attach the cabinets to each other, use a no. The ledger board is a temporary board you will use to make installing the wall cabinets easier. Get detailed instructions on installing wall cabinets in any room, here: Extreme caution should be used when maneuvering large cabinets to avoid scratching the cabinet or existing walls.
Orient the first peninsula cabinet at a right angle to the wall. Make certain the board used is flat, and ensure the board is level as you put it up. Secure upper cabinets to wall studs and adjacent cabinets with cabinet screws. Then, drill and countersink four pilot holes and attach with screws. Drill holes at each of your marks on the ledger or the back of the cabinet.
Kitchen And Bathroom Renovation: How to Install Wall ... from 3.bp.blogspot.com Take that measurement and make a pencil mark on your filler strip (measure over right to left in this case). To ensure a flush fit between this unit and its neighbor, join the two with a clamp. Then, drill and countersink four pilot holes and attach with screws. Hanging upper kitchen cabinets is the next step in this series. These steps describe installing framed cabinets. Use the spirit level to mark exactly where the outline of the cabinet will be, making sure the corners are clearly defined. A ledger is a board that helps support the cabinetry as you work. Extreme caution should be used when maneuvering large cabinets to avoid scratching the cabinet or existing walls.
Once on the ledger, shim the cabinets if it is essential.
Mark the outline of each panel on the wall in its correct position. Remove cover caps on inside of cabinet. Lastly, remove the cabinet and use a belt sander to sand away the excess. Put the cabinet jack beneath the cabinet, adjusting it so that it holds the cabinet level to the marked chalk line. First, cut the filler strip to the required width and attach to the cabinet. A ledger is a board that helps support the cabinetry as you work. Clamp the filler onto the cabinet flush with the inside of the vertical rail. Cabinets should always be firmly mounted to walls to prevent accidental detachment. Set it on the wall and secure it to the studs with screws. Put the cover cabinet in place leave a space between the cabinet and wall as recommended by the cabinet manufacturer. Repeat the whole process for the remaining cabinets. Use the spirit level to mark exactly where the outline of the cabinet will be, making sure the corners are clearly defined. Attach a cabinet to concrete walls with help from a kitchen cabinet.